Surgical Pearls in Total Knee Arthroplasty: A Lifetime of Lessons Learned
Total knee arthroplasty (TKA) has evolved into a very successful procedure to relieve pain and improve function in the patient with advanced arthritis. Both short- and long-term outcomes are dependent on optimal surgical technique. In this article, I share a few of the many lessons learned over more than 40 years of experience performing TKA regarding exposure, alignment, bone preparation, correction of deformity, and prosthetic implantation.
After over 4 decades of experience with total knee arthroplasty (TKA), I have learned many lessons regarding surgical technique. These include exposure issues, alignment methods, bone preparation, correction of deformity, and implantation techniques. Most of these lessons have been self-taught, but some have been suggested by or modified from colleague and student interaction. Attribution is given when possible.
The Incision
The skin incision should be marked in flexion rather than extension because the skin moves approximately 1 cm laterally from extension to flexion.1 This occurs because the tibia internally rotates beneath the skin as the knee is flexed and externally rotates as full extension is achieved. This lateral movement of the skin could bring an incision marked in extension on top of the tibial tubercle when the knee is flexed and may result in pain and dysfunction when the patient attempts to kneel. A review of kneeling ability after TKA showed that most patients are hesitant to kneel initially after their arthroplasty, but gain confidence and improved comfort and ability as their scar matures.2
Exposure
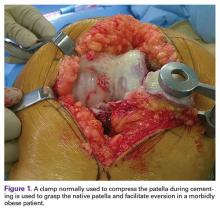
Patellar eversion can be difficult in a markedly obese or ankylosed knee, especially when the patella is difficult to grasp. This is facilitated by the use of a standard patellar clamp that is normally used to compress the patella during component cementation (Figure 1).3
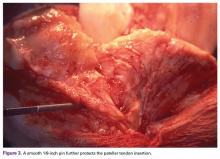
Exposing the Ankylosed Knee and Protecting the Patellar Tendon From Avulsion
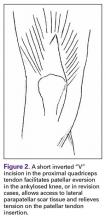
A tibial tubercle osteotomy is often recommended in the ankylosed knee but can be avoided by making a short inverted “V” incision in the proximal quadriceps tendon (Figure 2).4
Protecting the Soft Tissues During Surgery
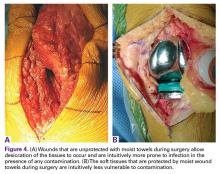
Moist wound towels sewn into the joint capsule protect the underlying soft tissues from debris and desiccation during the procedure and will intuitively lower the chance of wound infection from contamination and tissue injury (Figures 4A, 4B).
Locating and Coagulating the Lateral Inferior Genicular Vessels
The lateral inferior genicular artery and vein can be easily located and coagulated just outside the posterior rim of the lateral meniscus near the popliteus hiatus. This will minimize both intraoperative and postoperative blood loss.
Determining the Entry Point in the Distal Femur for Intramedullary Alignment Devices
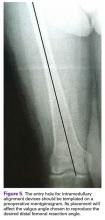
Templating the femoral entry point for insertion of an intramedullary alignment device on a preoperative radiograph will help avoid inadvertent excessive distal femoral valgus resection. This is especially important in valgus knees that have a valgus metaphyseal bow (Figure 5).
Avoiding Notching of the Anterior Femoral Cortex
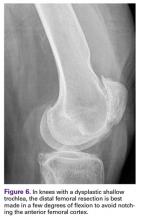
Notching the anterior femoral cortex when in-between femoral sizes or when there is a preexisting dysplastic or shallow trochlea (Figure 6)
Obtaining a Medial Release by Removing Peripheral Medial Tibial Bone
Varus deformities can be corrected without performing a formal medial collateral ligament (MCL) release by a so-called reduction tibial osteotomy.5,6 In mild varus deformity, sufficient medial release can be achieved by removing medial femoral and tibial peripheral osteophytes that tent up the MCL and medial capsule. When this is insufficient, removal of additional peripheral tibial bone further shortens the distance between the origin and insertion of the MCL, effectively lengthening the ligament (Figure 7).


